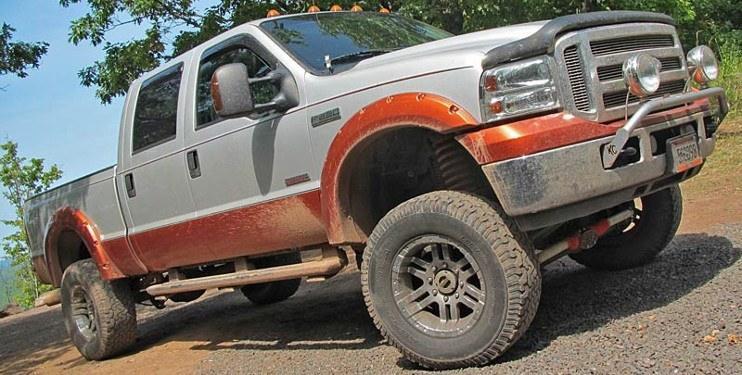
How To Paint Fender Flares
If you're in the market for painted fender flares, or recently purchased fender flares and want to know what it takes to paint them, this guide is for you. By default, most fender flares come in a matte black color. While this looks great on virtually all trucks and SUVs, some owners like to step it up a notch and have their flares painted to match their vehicle.
For 2-tone trucks (popular with Ford) many customers also choose to have their flares match the bottom color on the truck for added style.
Remember that smooth flares are easier to paint and are less expensive, while textured flares may or may not be able to be painted. For textured flares, it's important to check before purchasing, especially with your preferred painter. During the painting process the flares need to be sanded down, which can remove the texture on a lot of flares.
For an easy solution, check out our line of pre-painted fender flares, available in TrueEdge Pocket/Bolt, Street, and OE Styles.

How to Tell If Your Fender Flares Can Be Painted
Generally, manufacturers produce matte black, smooth fender flares that can be painted. If you are viewing our >line of fender flares, our descriptions will state if the flares can be painted. Or, you can save yourself the hassle and have us paint the flares for you, so they arrive at your door - ready to install - in your preferred paint color. We offer pre-painted smooth flares in TrueEdge Pocket/Bolt, Street, and OE Styles, available in any color with clear coat added.
If you're still uncertain, please ask us and we will be more than happy to assist you.
Before Painting Notes
Remember: Painting has to be done prior to installing fender flares.
Remember: Do not install the flare or apply any of the corresponding hardware until the paint has dried.
- Before beginning, hold the flares to the vehicle's surface and make sure they fit correctly. Once you're sure you have the correct flares, you can begin looking for the proper paint to use.
- Find the proper paint for your car or truck. Generally, your paint code can be found on a sticker in the driver's side door jam. Some auto shops will list the color code for you vehicle. They are found in a book by model, make, year and color. Alternately, you can call the dealership of purchase, look in the vehicle's owner manual, check the vehicle manufacturer's website, or call them directly. Once you have checked the paint code and purchased the paint - as well as all the necessary supplies - follow the paint manufacturer’s directions and guidelines exactly. This will promise the best warrantied process from your coating's manufacturer. If you need help locating your paint code, let us know and we will be more than happy to help.
- Be sure your color coat has a flex additive. This will help prevent the paint from cracking.
- Use a high quality degreaser to clean the outer surface. Never use lacquer thinner or reducer as it will repel the paint. Before painting, thoroughly wipe down the outer surface of the flares with a tack rag. Even trace amounts of dust on the flare can cause the paint to flake and peel.
Painting Process
- Use 200 grit sand paper to sand the surface of the flare. This will remove imperfections and rough spots on the surface of the flare. Doing so allows the primer to adhere to fender flare. After sanding, wipe the entire surface of the flare with a tack cloth to remove any dust on the flare.
- Treat the surface of the flare with an adhesion promoter. Sand the flares again with a very light sanding - use a 2000 grit scotch brite pad. Once more, wipe the surface with a tack rag.
- Apply 1 coat of polypropylene primer. Apply a 2nd coat as needed.
- Apply your paint to the fender flare. Use slow, sweeping motions. For best results, apply two or three thin, yet even coats on the flares. This helps avoid runs in the paint.
- Mist or dust the first coat of paint onto the flare. Let it dry for approximately 30 minutes - check the manufacturer's guidelines for exact drying times.
- Continue with additional coats of paint until you have the desired coverage for your flare. Be sure you allow each coat to dry before adding the next coat.
- Apply clear coat as desired, usually 1-2 coats.
- Let the fender flares dry for 24 hours. This will completely harden the paint.
Repainting Your Fender Flares
Do not remove paint from your flares if you want to repaint. Paint strippers soak into the plastic and ruin the flare. This will cause the next coat of paint to peel off. The best course of action is to leave the paint on the flare. Lightly sand the surface, treat it with primer, and then repaint your flares.